Showing posts with label floor refinishing. Show all posts

5/27/2010

Upstairs floors: progress report

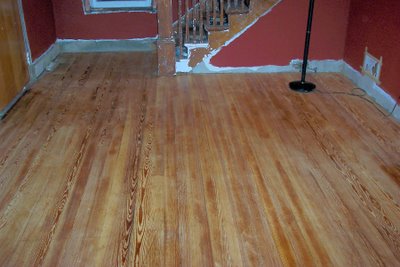
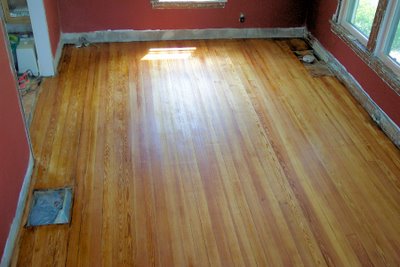
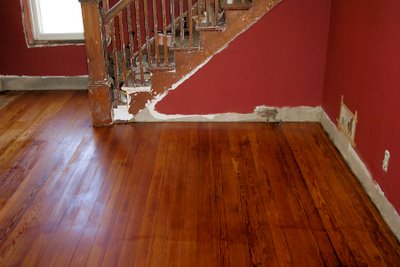
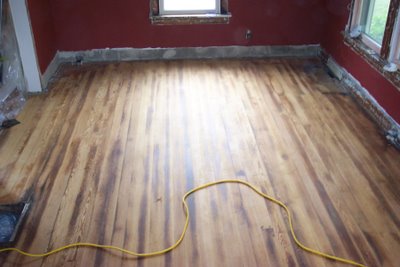
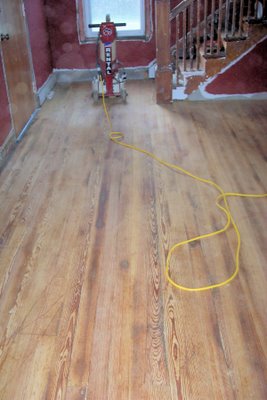
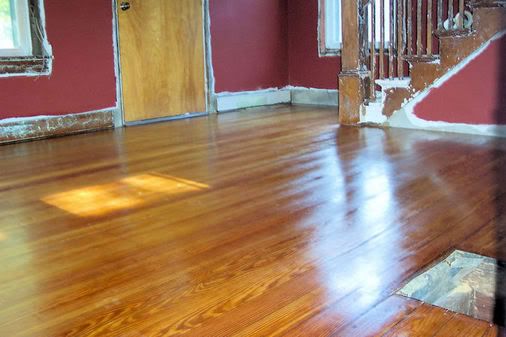
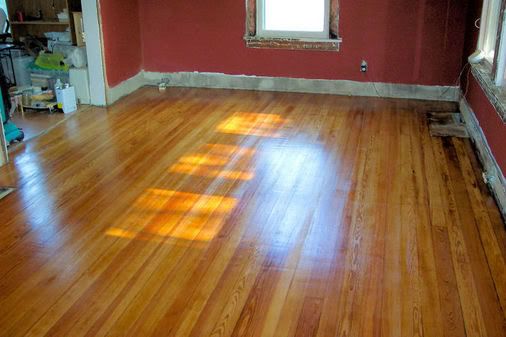
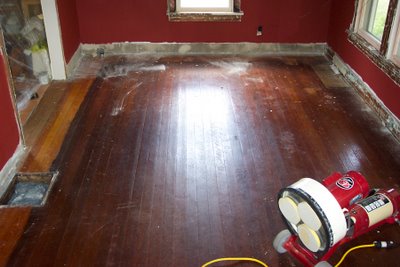
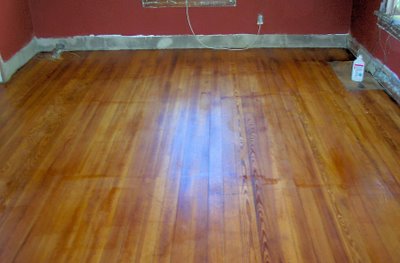
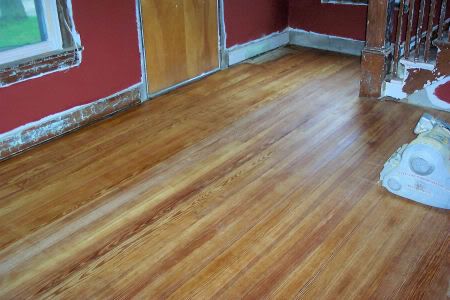
The sanders came at about 11:30 this morning and were here for at least 6 hours.  I was kind of surprised, since I don't remember the living room sanding taking very long.  But it might have seemed like less time since I was the one doing it.  Plus it was a smaller area, and unlike the upstairs, it wasn't broken up into little rooms and closets.  By 6:30 pm I had freshly sanded floors, and it was time for me to get to work.  I swept again, then put on my first coat of shellac.  I don't have any photos of the fresh shellac (I'll get some tomorrow), but here is a shot of each room with the newly-naked pine.


More shellac tomorrow!

Floor sanding today!

And I don't have to do it this time!  Lately we've been taking the "Y" out of DIY and just paying people to get it done.  This was supposed to be finished last summer.  Before I had the baby.  Yeah...

But at least it's finally going to happen.  The crew will be here sometime after 11 am, so we emptied the entire upstairs into the living room.
Thank God it's temporary.  I cannot believe there are people who live like this all the time.  Granted, they probaby don't have 2 large dogs, a cat, a boxful of chicks, and a baby, but still.

And speaking of the boxful of chicks... The coop is nearing completion!  [insert happy dance here]  We're done painting except for the trim that we will put up over the exposed ends of the hardware cloth, and then we just have to staple up the wire and glaze and install the windows.  The girls will be in there within a few days.  I can't wait.  They're very cute, but the constant cheeping is making me crazy.  I've never had a bird as a pet, and I can now promise you that the only birds we'll ever have will be yard birds.  There's no way I would tolerate this all the time.  3 weeks is plenty.

I finally got the tomatoes planted (Thanks Mom #2!), and I'm thinking that another 6 plants wouldn't be a bad thing.  I'm going to have romas everywhere in August, but I plan on making lots of sauce.  I still need to get a pepper plant or two, and maybe potatoes if I can find them.  I'm kind of late...  As usual.

More later...

3/23/2010

Preparing to have the floors sanded

Yep, I'm cheating again...!  Since the baby came along, we actually have more time than money.  We rarely go out, and between our work schedules, we don't have much time available where one of us can watch the baby and the other can work on a project.  I don't want Ethan to grow up too fast, but I really can't wait until he can sit up by himself.  At least I can get yard- and housework done by strapping him into the Beco carrier.  I don't know how people functioned without a baby carrier of some kind.  It's especially nice now that he can hold his head steady.  I can just put him on my back like a backpack, then get busy with whatever needs to be done.  9 times out of 10 he goes to sleep.  And if he doesn't, he's happy to just watch what I'm doing.  It's a lifesaver.

But one thing I don't think I can manage is sanding the upstairs floors myself.  Obviously the dust and noise would be bad for the kidlet, but time is definitely an issue.  I think I can do the finishing myself.  3 coats of shellac over 3 days should be within my abilities, so long as it's on my days off.  If I can do a coat each night before bed, we should be able to walk on it by mid to late afternoon.  The only reason that's so important is because our only shower/tub is up there.  I'll be making the appointment today, and hopefully they'll have something open the first week of April. 

Too bad we'll have to move the entire upstairs into the living room for a week or so.  Ugh.  I am NOT looking forward to that part...  To prepare, I spent part of Sunday cleaning out my closet and organizing the boxes of office stuff.  I got rid of quite a bit, which was good.  It's amazing how much crap you can accumulate.  And in this case, where we never really unpacked all the office stuff after moving in, I'm amazed at how much we don't actually use.  Obviously some things you need to keep even if you only use them twice a year (stapler, envelopes, thank-you cards), but I was able to pare it down.

Another thing I'm trying to pare down is our book collection.  I LOVE books.  But between the two of us, we probably have 6 bookcases full.  I'm not exaggerating.  We gots lots.  So we've decided to donate all  books that we don't think we'll ever read again.  I'm teetering on the classics.  Some of them I know I'll never read again.  Some of the ones I have, I've never read.  But every so often, I'll pick one up and read it.  Which is how I read the Ann of Green Gables series as a 25-year-old.  I suppose I'll keep them for now.  They only take up two shelves...

12/13/2007

Score! Salvaged pine flooring

Shayne and I stopped by the Habitat for Humanity ReStore yesterday to look for a "new" front door. We didn't have much luck with that, but we did find 2 boards of antique pine tongue-and-groove flooring that match our floor perfectly! The best part is that they were only $1.25 each! The boards aren't too long, maybe 4 feet, but they'll help us on our way to patching the living room floor where some big heat vents once were. Note to self and anyone else who might read this: patch the floor before refinishing... That wasn't really a feasible option for us, since it's taken me this long to find matching flooring locally. I probably should have just ordered some from an online salvage store, but oh well. I was also hoping to find registers that fit the opening that match our old ones, but that hasn't happened either. Just more proof that I really have no idea what I'm doing.

8/01/2006

A Good Shellacking

Shellacked living room floor eye candy!

Photobucket - Video and Image Hosting
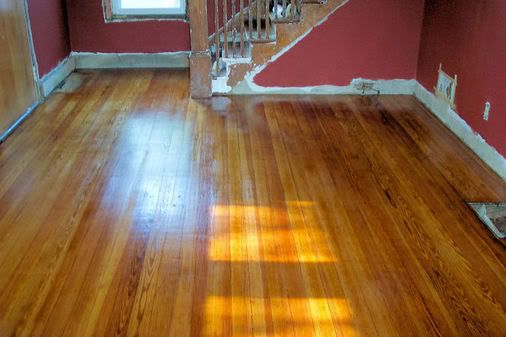
I'm still going to put one more coat of shellac on, but it looks awesome. The floor is glossy with a depth of color that is amazing. I've been doing the happy dance for the past 2 hours, since I'm so relieved that I didn't screw it up this time...

7/22/2006

A floor to be proud(er) of

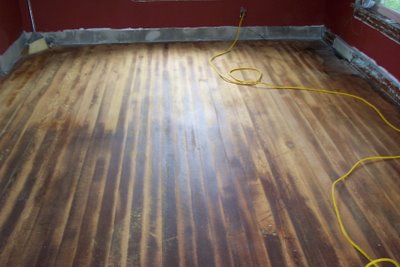
The floor has gone through quite a transformation this week. We went from this:
To this: Back to this:
And finally, to this: We're not done yet, but the first coat of shellac went on beautifully this time. No problems. Of course, it also helps that I did it right... This time around, I used clear shellac. For every 2 cups of 3lb cut I used, I added 1/2 cup of denatured alcohol to thin it. I also made sure to spread it as smoothly as possible from one end of the board to the other (lengthwise). I only did 3 boards at a time this time, and I instead of using the lambswool applicator on the pole, I got down on my hands and knees so I could monitor the coverage more closely. I think that the results speak for themselves, but the floor looks so much better than it did before that I can hardly believe it. The far left side in the picture is still wet, which is why it looks a little darker than the rest of the floor, but everything is a uniform golden color with no splotches or thick spots. The only flaw is a deep scratch that runs the width of the floor, right in the middle of the room. It didn't show up well in the above picture, but it's pretty noticeable in person. I sanded the hell out of it, but it was so deep that it didn't help much. Once we have a rug, though, it should be less visible.
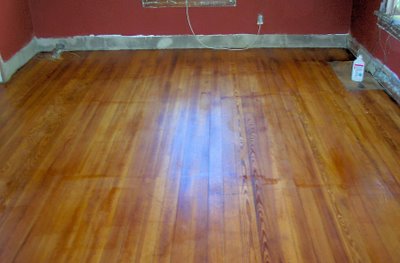
Later today I plan to put on another coat of shellac, this time one-third amber and two-thirds clear. I'd like the floor to be just a little darker and less yellow, but I don't want to lose all the bright happiness of the clear coat. After the second coat, I'll add a third coat of thinned clear before I wax. That should be another adventure, since I've never waxed a floor before in my life. Whee...

I really can't express enough how thrilled I am that the floor turned out this well. After having to re-sand the floors, I was terrified that I'd just ruin them again. I agonized over whether I should just give up the whole shellacking thing and just polyurethane them like everyone suggested. Shayne was supportive of whatever I decided, so long as I would be happy with the results. Everyone else said that the shellac was a bad idea and poly was the way to go, except for my best friend Diana. In the end, I followed my gut and my ideals instead of following the crowd, and I'm so glad I did. The poly-ed floors upstairs just don't have the warmth and natural look that the shellacked floor does.

7/20/2006

Sanding the Floors, Part II

Due to my really crappy shellacking, I decided to start from scratch. Again. This time, I did it right. We rented a drum sander and truly leveled out the floor. The drum sander is a totally different beast than the Medusa-like orbital sander, but once I got going I was fine. It was the getting going that was the problem.

Shayne picked up the sander from the rental place and deposited it in the living room. After showing me how to load the paper, he left for work. Alone with the scary machine, I warily turned it on. Loud, but no problems. I started to slowly push it forward while rocking it down to contact the floor. Disaster. The second the drum hit the floor, the sandpaper exploded and flew everywhere. I quickly turned off the machine and went to assess the damage. The floor was a little shredded, but since I was moving, it was a line and not a gouge. I got a new sheet of paper, reloaded, and tried again. This time, I moved about 12" before the paper exploded off the drum. Since I was already afraid of the drum sander (due to the horror stories I'd heard about it runnning away and ruining floors), the fact that it kept exploding at me only made matters worse. My floors were ruined, the sander wouldn't work, and I'd have to get wall-to-wall carpet to hide my damage. In light of those revelations, I did what any self-respecting, modern woman would do: I burst into tears of frustration and went to hide upstairs.

I came back down about 30 minutes later, after reading about the SL-8 sander on the internet. Supposedly, if the cams that hold the paper are not tight enough, the paper will break. I gingerly loaded another sheet of 36 grit paper, tightened the cams fully, put in earplugs, and turned the sander on. The Exploding Paper Monster was vanquished, and a purring tiger was left in its place.

I had heard horror stories about gouged floors and uncontrollable sanders, and I feel obligated to say that, if you use it properly, it's very easy to use and control. Aside from my paper explosions, which were completely preventable, the sander is a tame beast. It doesn't pull like I expected (I could contol it with one hand, even though I used 2), and the only gouge I got was when I sneezed with the sander moving along the floor. It hardly uses any sandpaper at all compared to the EZ-V. I used 6 sheets for the whole room, including the 2 that I ruined. Total rental cost was under $50. Guess what sander I'll be using next time?

After sanding, I wiped down the floor with mineral spirits and prepared to re-shellac. This time, I used a thinned down coat of clear, and I only applied it to 9 boards in case it was horrible. I applied it to 3 boards at a time, moving with the grain, and coating the whole board at one time. Here are the results:
9 shellacked boards
The 9 shellacked boards are little darker than the natural wood, but not too much. The color variation is due to the floor, not the shellac (thank God!). I'll still be adding a coat or two of amber over it, but it's a nice start...

7/15/2006

Beetle juice

I woke up at 8:30 this morning to return the floor sander to K Wood Products, which is the hardware nearest our house. We kept it under $175 in rental fees and sandpaper, but just barely. The gentleman that works there (possibly the owner) is going to start looing for picture rail molding for me, which is awesome. They have a sample on their board of woodwork that they stock, but he said that because it's not that popular, they didn't reorder when they ran out. Hopefully I'll be hearing from them soon.

We didn't get to bed last night until after 2 am. We wanted to get the first coat of shellac on the floor so that it could dry overnight. It didn't turn out perfectly, but I'm satisfied with it so far. We'll need to put on at least one coat of amber shellac, then use clear as "build coats". Even with just one coat, the floor has a nice sheen and color. It's still a little too yellow for my taste, but the second coat thould take care of that. The only bad part is that there are lap marks and slight unevenness where I had to refill the applicator. There are more towards the south end of the room, where I started, than at the north end. I think at the beginning, I was putting it on too thin, and it dried while I was refilling the applicator. Towards the north end, I started to be a little more generous with the shellac, and there are fewer lap marks, and the color is richer. I've tackled a few spots with denatured alcohol and steel wool, and the color has smoothed out, so now it's just a matter of doing that everywhere there's a mark. I'd better go get some kneepads...

South end

North end

Surprisingly, we didn't have too much sawdust floating around. The sander did an excellent job of picking up its dust, so almost all of the mess was from the little orbital sander. I think that next time, I might get brave and rent a drum sander, but overall I'm satisifed with how everything has turned out.

In case you're curious about the title, "beetle juice" is Shayne's name for shellac. It doesn't sound quite so glamourous that way, but it is accurate, since shellac is made from the secretions of the female lac beetle. The resin is then harvested off of trees, supposedly without harming the beetle.
7/14/2006

Fun With Floor Sanding

After working most of the day, I am just about finished sanding the floor. Shayne is downstairs working on sanding around the edges, and I'm taking a much-needed break.

Today went much better than yesterday. The floor was dry and free of nealy all shellac. The boards were more cupped than I anticipated, so I ended up having to go back to the hardware store for more super-rough paper. Even now, there are some spots on a few boards that refuse to level out. We're going over those with the hand sander to get the last bits of old finish off, but they're just going to have to stay unlevel.

It's pretty ironic that I was worried about the floor sander being too aggressive. The exV is almost not aggressive enough. The living room floor is probably one of the worst, since it sees so much use, but I might use a drum sander on our other downstairs floors. Having not done this before, I'm not sure how long it usually takes to sand a floor, but we seem to be progressing rather slowly.

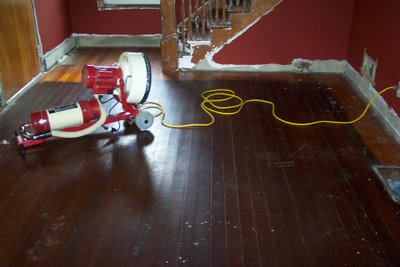
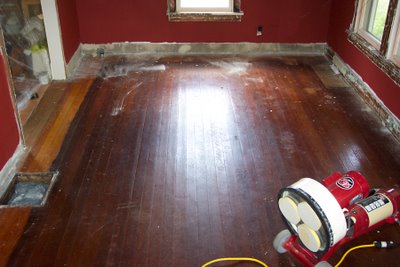
Here are a few "before" and "during" pictures for your viewing enjoyment:
I tried out the amber shellac on a board in the office last night, and it looks good. I think we'll be doing a few coats in clear to keep it from getting too dark, but it should look really nice.

7/13/2006

Discouraged

I can't believe I was excited about having floors with the original finish intact, since it means more layers of crud to get through before I can sand the wood. I also can't believe what a bitch this shellac is to remove. I've stripped it with Citristrip, washed the floor twice, and mopped with denatured alcohol, and and I think it's finally off. However, the sandpaper is still gumming up, since the floor is now too damp. It's dry to the touch, but the sander must know the difference.

Lesson: Do better prep work beforehand. Don't expect the sander to do more than sand the wood. Get the shellac off before trying to sand, and give plenty of drying time...

Nothing Is Ever Easy

I should know by now that nothing ever goes as planned. I should be downstairs sanding the floor, but here I am upstairs piddling around on the computer. Now why would that be...? Well... I guess the shellac on the floor was in better shape than I thought. There's so much left on the floor that it was gumming up the sandpaper in about 45 seconds. Since it was a pain in the ass to keep stopping to pick the clumps off the paper, I 'm stripping the floor first. I tried scrubbing the floor with denatured alcohol, but it was extremely labor-intensive (i.e. it hurt my bad shoulder) and I ended up with a 1.5" splinter in my palm. That was the end of that. I slathered on some trusty Citristrip about 20 minutes ago, and I'll go scrape it off in about another 20-30.

I should have known this would happen. I'd read about it happening to other people. I just didn't think that our shellac was that thick. So... Here I am, biding my time and kicking myself for not prepping properly. Live and learn, I suppose.

7/10/2006

Shellac and Floor Sanding Madness

It's official: The floor refinishing madness will begin on Thursday. On last Thursday, Shayne and I stopped by a local hardware store to inquire about their floor sander rentals. I've decided that I do not want a drum sander, since our floors are in good shape and don't need any radical leveling. They also don't seem to have many layers of finish. Surprisingly (to me), they rent Varathane's ezV sander, which is the Medusa of orbital sanders. The ezV resembles an oversized carpet cleaner, and it has 3 smallish random-orbit heads positioned in a triangle. It is supposedly tough enough to strip the finish off a floor, but gentle enough not to leave gouges. I guess we'll find out on Thursday...!

I'm feeling pretty good about the sanding, but I'm very nervous about the finishing. Against many people's better judgement, we've decided to finish the floors with shellac and not polyurethane. Every time I tell people this, even old house people, they tell me how wonderful oil-based poly is and how weak a finish shellac is. Maybe I'm missing something here, but the original, 80+ year old shellac on the floor downstairs looks fine. It's not worn down to bare wood or scratched to hell, and it looks way better than the edges that were refinished probably inthe '60s or '70s with varnish. In some ways, it even looks better than the polyurethane upstairs, since it really brings out the texture of the wood. It looks like wood, not wood coated with something, if that makes any sense.

So, Thursday will be sanding, and Friday and Saturday will be devoted to shellacking. I'm going to go panic now...